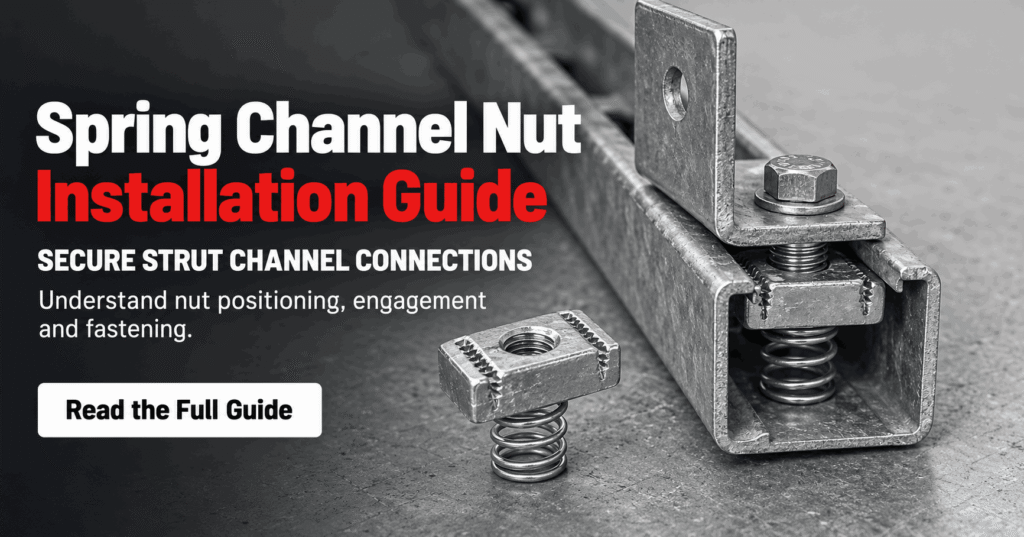
A spring channel nut installation is quick once you know the method: push the nut into the strut channel at any point along the slot, give it a quarter turn so it sits crossways behind the channel lips, then tighten your bolt to lock it in place. The spring holds the nut snug against the inside of the channel while you position it, so it does not fall out before the bolt is tight, and the nut’s teeth bite into the channel ridges for a firm grip. This is what makes strut channel so fast to work with: you can add a fixing anywhere on the run without drilling. To remove a nut, loosen the bolt, turn the nut back a quarter turn, and slide it out. Ashish International, with 25+ years manufacturing MEP fasteners, produces spring channel nuts to match standard channel, and this guide shows how to fit and remove them correctly.
How a Spring Channel Nut Actually Works
Understanding the design makes the installation obvious. A spring channel nut has three parts working together: a threaded nut body, grooved teeth on top that match the ridges inside the channel, and a spring underneath that pushes the nut up against the channel lips. When you drop the nut into the slot and turn it a quarter turn, the teeth line up across the channel’s inturned lips, and the spring holds it there under tension. Tightening the bolt then pulls the nut hard against the lips, and the teeth lock into the ridges so it cannot slide under load. The spring’s real job is convenience: it keeps the nut in position hands-free while you line up the fixing, especially useful overhead. Know that the teeth grip and the spring only positions, and both installing and trusting the nut become straightforward.
Fitting a Spring Channel Nut, Step by Step
The method is short and works the same on any standard strut channel. Follow these steps:
Choose the spot: pick any point along the channel slot; no drilling or measuring to a hole is needed.
Push the nut in: press the nut into the slot against the spring until it is inside the channel.
Quarter-turn to seat: rotate the nut 90 degrees so its teeth sit crossways behind the channel lips.
Check it is square: the spring holds it in place; make sure the nut sits straight across the channel.
Insert and tighten the bolt: run your bolt through the fixing and into the nut, then tighten to lock it.
The quarter turn is the step people get wrong. Turn it too little and the teeth do not fully seat behind the lips, so the fixing can pull out. Push, quarter-turn, and tighten in that order, and the nut locks securely every time.
The Mistakes That Cause a Nut to Slip
A spring channel nut is reliable when fitted right, but a few errors undo it. Watch for these:
Under-turning: not completing the full quarter turn leaves the teeth off the lips, so the fixing can fail.
Cross-threading the bolt: forcing a misaligned bolt strips the thread and weakens the joint.
Wrong nut size: a nut that does not match the channel profile will not seat or grip properly.
Mixed metals: a plain-steel nut on a galvanised or stainless channel rusts at the joint and weakens over time.
Over-tightening: excessive torque can strip the thread or distort a light-gauge channel.
Under-turning causes the most failures, because a half-seated nut can look fitted yet pull straight out under load. Fit the right nut fully and tighten to a sensible torque, and slipping is not a problem you will meet.
Removing and Repositioning a Nut
One advantage of spring channel nuts is that they come out as easily as they go in, which matters when a layout changes. To remove a nut, loosen and withdraw the bolt, then turn the nut back a quarter turn so its teeth line up with the slot, and slide or lift it out. The nut can be reused if it and its threaded rod or bolt are undamaged.
Why This Matters for Adjustable Systems
Because a nut can be added, moved, or removed anywhere along the channel without drilling, a strut-channel system can be re-laid-out as a building’s services change, a real advantage in factories, plant rooms, and MEP support structures that get modified over time. Repositioning without re-drilling is exactly what makes channel-and-nut systems so adaptable compared with fixed brackets.
Matching the Nut to the Channel and Finish
A spring channel nut only performs if it matches the channel, so a quick spec check pays off. The table below sets out what to confirm.
| Check | Why it matters |
|---|---|
| Channel profile fit | The nut must match the channel width and lip form to seat |
| Thread size | Bolt and nut threads must match (M8, M10, M12, etc.) |
| Finish | Match nut finish to channel, galvanised or stainless |
| Spring type | Long or short spring to suit channel depth |
| Load duty | Heavier fixings need a nut rated to match |
The check that catches most problems is finish, because a mismatched-metal nut is the hidden cause of joints that rust years later. Match the nut to the channel’s profile, thread, and finish, and the fixing lasts as long as the channel it sits in.
Nuts Made to Grip and Last
A channel nut is small, but it is the part that actually holds a fixing to the channel, so its teeth, spring, and thread quality decide whether a support holds. Ashish International brings 25+ years across three units and 60,000 square feet, producing 350 tonnes of MEP support a month under in-house quality control, so nuts seat cleanly, grip firmly, and match the channel they are made for. MEP contractors, stockists, and sourcing companies across the UK, Europe, the Middle-East, Australia, and Africa rely on that fit and consistency, and several have worked with us for over 20 years, some under NDA for their own designs. We manufacture nuts, channel, and pipe clamps to the dimensional standards global specifiers expect, and for brands and MNCs we run the full range as white-label, your spec, your branding, with FITSTRUTS® where a stock line fits. For product data, samples, or a white-label discussion, call +91-99888-54380 or email ashishint2001@gmail.com.
1. How do you install a spring channel nut?
Push the nut into the strut channel slot at any point against the spring, give it a quarter turn so its teeth sit crossways behind the channel lips, check it is square, then run your bolt in and tighten to lock it. No drilling is needed: the nut fits anywhere along the channel.
2. Why does a channel nut need a quarter turn?
The quarter turn rotates the nut’s teeth so they sit across the channel’s inturned lips instead of lining up with the open slot. This is what lets the nut grip and carry load; without the full quarter turn, the teeth do not seat and the fixing can pull straight out.
3. What does the spring on a channel nut do?
The spring pushes the nut up against the inside of the channel lips so it stays in position hands-free while you line up the bolt, especially useful overhead. It positions the nut; the load is actually held by the teeth gripping the channel ridges once the bolt is tight.
4. How do you remove a spring channel nut?
Loosen and remove the bolt, turn the nut back a quarter turn so its teeth line up with the open slot, then slide or lift it out. If the nut and bolt are undamaged, they can be reused, which is what makes strut-channel systems easy to re-lay-out.
5. Do your spring channel nuts fit standard strut channel?
Yes, we manufacture spring channel nuts to match standard channel profiles, thread sizes, and finishes, so they seat and grip correctly. We supply galvanised and stainless options and produce to your drawings, with white-label supply for stockists, brands, and sourcing partners under NDA.