Cantilever Arm Installation for MEP Supports
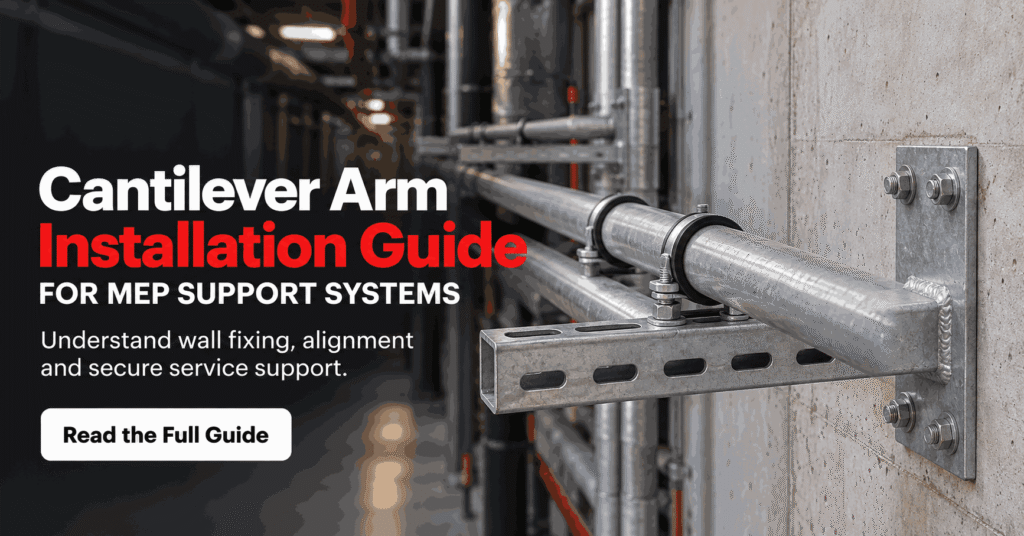
A cantilever arm installation in MEP means fixing a strut-channel bracket to a wall or column at one end so it reaches out horizontally to carry pipes, cable trays, or ducts along that face. Only one end is fixed, and the arm projects out like a shelf bracket, so the load hangs off an unsupported length, which makes correct fixing and load placement critical. To install one, you anchor the arm’s back plate firmly to the wall or clamp it to structural steel, check it is level, then load the services along it, keeping heavier items closer to the fixed end. The key rule is that a cantilever arm carries less the further out the load sits, because leverage increases the pull on the fixing. Ashish International, with 25+ years manufacturing MEP supports, produces cantilever arms rated for these fixings, and this guide shows how to install one safely and place the load right. How a Cantilever Arm Carries Its Load Understanding the leverage explains every installation rule that follows. A cantilever arm is fixed only at the wall end, so the whole load is held by that single connection and the arm’s own stiffness. When a pipe sits near the fixed end, the pull on the anchors is modest; move the same pipe to the far tip, and the leverage multiplies the force trying to pull the arm off the wall and bend it down. This is why a cantilever arm’s rating is quoted against where the load sits, not just its total weight. The same arm safely carries far more close in than at the tip. For heavier loads, a gusset or brace between the arm and the wall shortens the effective leverage and stiffens the arm. Grasp that leverage rises with distance from the wall, and correct load placement becomes obvious. How to Install a Cantilever Arm, Step by Step Fitting a cantilever arm is straightforward, but the fixing does the hardest work, so each step matters. Follow these: Choose the fixing point: a solid wall, concrete column, or steel member that can take the load and leverage. Fix the back plate: anchor it to concrete with rated anchor bolts, or clamp it to steel with beam clamps. Check it is level: an arm that droops loads the fixing unevenly and lets pipes drift. Add a brace if needed: fit a gusset or diagonal brace for heavier loads to cut the leverage. Load from the wall out: place heavier services closer to the fixed end, lighter ones toward the tip. The fixing at step two is where a cantilever arm succeeds or fails, because the anchors carry both the weight and the leverage trying to lever the arm off the wall. Fix it solidly, level, and load it wall-first, and the arm holds its rated load safely. Load Capacity by Position on the Arm Because leverage changes with distance, where you place a load matters as much as how heavy it is. The table below shows the principle for a cantilever arm. Load position Effect on the arm Guidance Near the wall (fixed end) Lowest leverage, highest safe load Place heaviest services here Mid-arm Moderate leverage Medium loads Near the tip Highest leverage, lowest safe load Lightest loads only Multiple loads Combined leverage adds up Total must stay within the arm’s rating The clearest lesson from the table is that the same weight is safe near the wall but may overload the arm at the tip, so position matters. Always check the arm’s rated load against where each service actually sits, and a wall-mounted run stays safe. Best Practices for Wall-Mounted Pipe Support A few habits separate a cantilever run that lasts from one that sags or pulls loose. Keep these in mind: Match the fixing to the wall: solid concrete or steel only; hollow or weak walls need special anchors or a different approach. Space arms correctly: set arm spacing to the pipe’s own support interval so no pipe sags between arms. Brace heavy or long arms: a gusset cuts leverage and stops the arm bending down over time. Match the finish: galvanised or stainless arm, anchors, and pipe clamps to suit the environment. Don’t exceed the rating: keep the combined load within the arm’s rated capacity at its load positions. Bracing heavy arms is the practice most often skipped, yet it is what keeps a long arm from slowly drooping under a sustained load. Fix solidly, space correctly, brace when needed, and a cantilever run performs for the life of the services. Where Cantilever Arms Are Used Cantilever arms suit any run of services along a wall or column rather than overhead. They are common in plant rooms and corridors carrying pipe and cable along a wall, in tunnels and service ducts, in car parks, and against the columns of pre-engineered buildings and warehouses. They also stack: several arms up a column carry multiple tiers of strut channel, cable tray, and pipe on one vertical line. Wherever services follow a wall, a cantilever arm is the natural support, and choosing it for those runs keeps floors and ceilings clear. Arms Rated for Real-World Leverage A cantilever arm lives or dies by whether it holds its rated load at the tip as well as the wall, so the arm’s stiffness and the fixing points behind it have to be made right. Ashish International brings 25+ years across three units and 60,000 square feet, producing 350 tonnes of MEP support a month under in-house quality control, so arms hold consistent strength and load ratings across an order. MEP contractors, stockists, and sourcing companies across the UK, Europe, the Middle-East, Australia, and Africa rely on that consistency, and several have worked with us for over 20 years, some under NDA for their own designs. We manufacture cantilever arms, channel, and matched fittings to the standards global specifiers expect, and for brands and MNCs we run the full range as white-label: your spec, your branding, with FITSTRUTS® where